Eco Bytes |
[home] |
Navigation
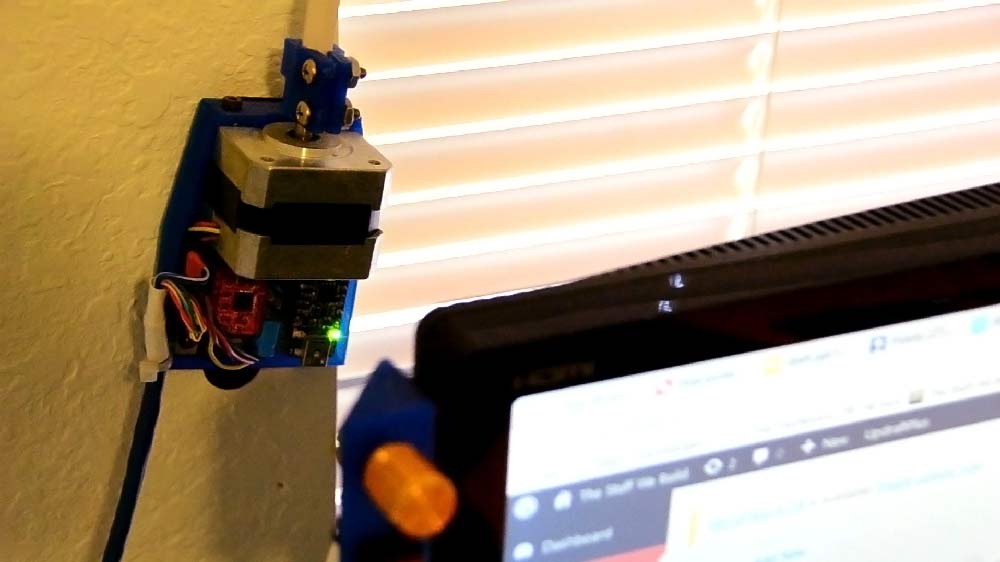
Trinket Servo Stepper Acceleration
21 April 2017 [This page was recovered from the TheStuffWeBuild WordPress Archive and adapted for this site in 2025.]Using a Trinket to control a stepper motor with acceleration - Dorm automation
Source download:
Shared here are two versions of the Arduino/Trinket sketch with slightly different functions. Both follow a mapped value proportional to the analog input pot. and Both are easily configurable. This started as a weekend project that was going to allow me to open/close my window blinds remotely... It turned into a need to make the Adafruit Trinket control a stepper motor with precision, speed, and (mild) elegance. The final program, all features included, filled only a mere 1/3 of the trinket's available flash. With all the necessary parameters to adjust rates, speeds, etc. brought to the top for easy tinkering, the original project turned into a useful analog to the common "Knob" example sketch, but with stepper motors, yo.Hardware:
The project was developed using a Pololu A4988 stepper motor driver. If you've messed with one before, you should have no trouble pairing it's pins with the Trinket's pins.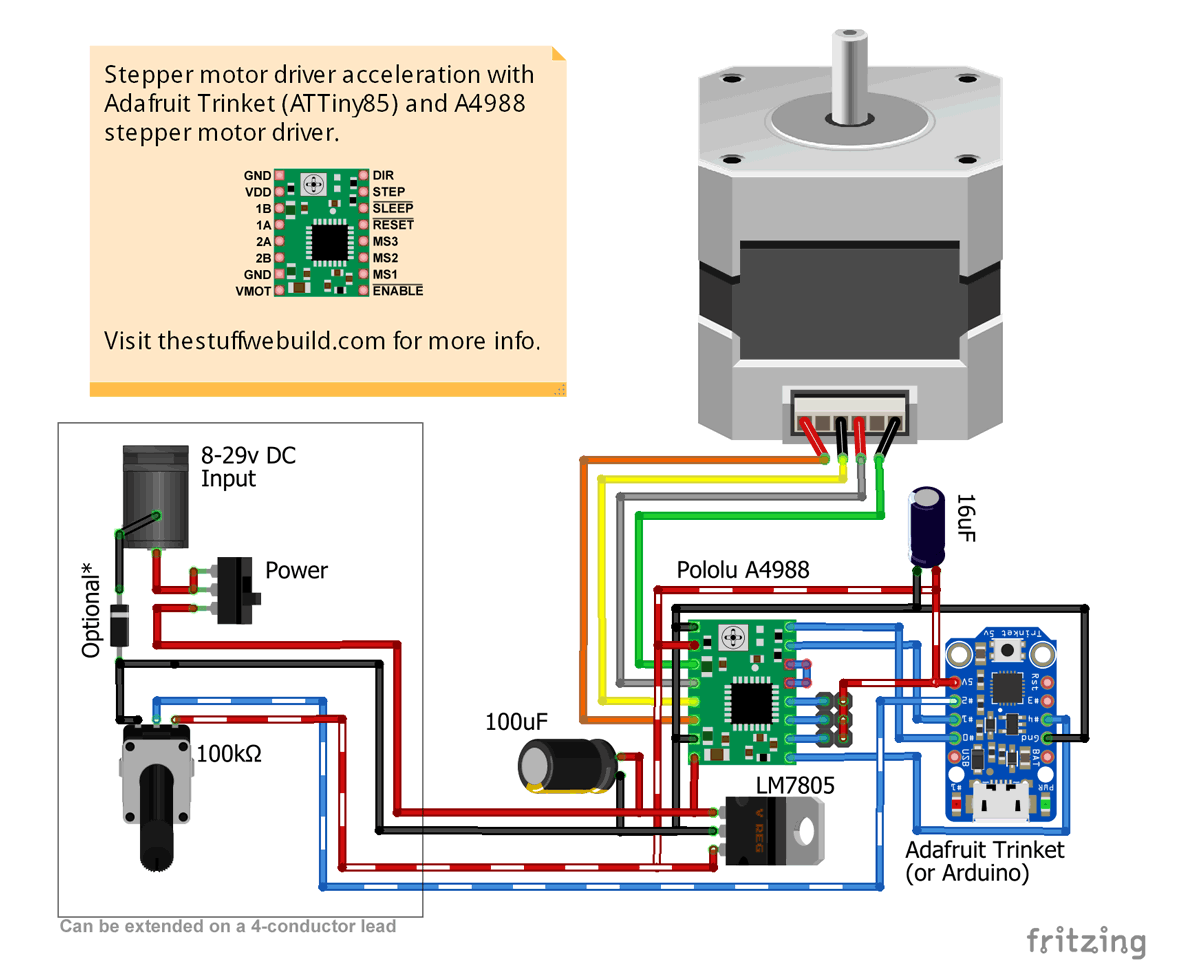
Note: The 5 volt voltage regulator (LM7805) should only be necessary if you intend to use a supply voltage greater then 15 volts. The Trinket has its own 5v/150mA voltage regulator input on Bat+, but it has a limit of 16 volts.
The Firmware:
Is should be noted that two versions of this project are available. "Trinket Stepper-Accel" is a more universal approach to stepper acceleration control. It centers around a "gotoStep(number)" function and can be easily edited or expanded to fit a range of other projects. "number" in this example is determined by something along the lines of map(analogPin, 0, 1023, 0, 12800); "Trinket Stepper-Fast" on the other hand is a more brute-force method. It works quite a bit differently, using bit-shift operations to quickly obtain a running average of a mapped value proportional to a potentiometer. It then sends "packets" of steps to the stepper driver, so as not to bog things down with a calculation between every step.- Trinket Stepper-Accel
- Info/use:
- Easiest way to use open-loop steppers with acceleration in your project. Performance variables are defined clearly at the top. Capable of high RPMs
- When the currentStep variable is at 0, and "gotoStep(1234)" is called, 1,234 step pulses will be sent to your driver, in a somewhat trapezoidal acceleration profile. "currentStep" is then updated to 1,234.
- When the currentStep variable is at 1,234, and "gotoStep(0)" is called, 1,234 step pulses will again be sent to your driver, but with the direction pin state flipped.
- Download:
- Info/use:
- Trinket Stepper-Fast
- Info/use:
- Behaves identically to the "Knob" example sketch in the Arduino IDE (File > Examples > Servo > Knob), but with a stepper motor. Rotational range can be be altered at will. 1/16th micro steps are recommended.
- It will respond immediately to an analog-in change.
- Download
- Info/use:
How it works:
In the case of the "Trinket Stepper Accel" sketch, all the acceleration mumbo jumbo happens in a for loop line. Its only input variable is the "needSteps" number which, as the name implies, is the amount of steps required in a particular instance. All the others are constant with the exception of the "stepDelay", which is on the output; it's how long the micro should wait between steps. Direction is determined beforehand with an "if" statement.for (int i = 0; i < needSteps; i++) { //Begin of for loop if (accelThreshX2 > needSteps) { stepDelay = maxDelay; //Go lowest speed } else if (i > accelThresh && accelThresh < needSteps - i) { stepDelay = minDelay; //Go fastest speed } else if (i <= accelThresh) { stepDelay = maxDelay - i; //Accelerate } else if (accelThresh >= needSteps - i) { stepDelay = maxDelay - (needSteps - i); //Decelerate } //Send pulse to stepper driver then wait digitalWrite(stepPin, HIGH); delayMicroseconds(1); digitalWrite(stepPin, LOW); delayMicroseconds(stepDelay * delyScaler); }//Go back to start of the for loop if still validOne issue with this design is the exponential acceleration rise. This can be mitigated to some extent however with careful tweaking of the acceleration parameters. For comparison, here is the equivalent part from the Fast version. Note the bitwise shift running average:
  //Map potentiometer value to step range
  gotoStep = map(analogRead(analogPotPin), 0, 1023, 0, stepsRange);

  //Make a fast running average (Where the magic happens)
  gotoStepAvg = (gotoStep + (gotoStepAvg << avgLevel) - gotoStepAvg) >> avgLevel;

  //Do some steps
  while (abs(gotoStepAvg - currentStep) > noiseThresh) {
    digitalWrite(4, LOW); //Turn on motor
    if (currentStep > gotoStepAvg) { //Go left or right?
      digitalWrite(directionPin, LOW); //Set direction
      currentStep--;
      Step();
    }
    else if (currentStep < gotoStepAvg) {
      digitalWrite(directionPin, HIGH); //Set direction
      currentStep++;
      Step();
    }
    else {
      //nothing
    }
    lastUpdate = millis(); //Update sleep timer
Let us know of any issues or changes you might want to see in the comments below.
Copyright © All Rights Reserved.